The boys have it right; it sure has been a long, cold winter, certainly here in upstate NY.
Somewhere around the end of January I start getting itchy, looking through the pile of seed catalogues that arrive in the mail. (My poor mail carrier; first the holiday catalogues in December and then, with no pause, into the onslaught from gardening and seed companies.) I know it’s too early to start but I want it to be time.
One of our local meteorologists said that our local winter has shifted a month. When the cold and snow used to start in December, it’s now beginning in January and is extended a month later. It certainly felt like that this year, with an amazingly snowy March. The weather service put out a map of our local area snowfall and it was mighty impressive (I was in the 24″ to 30″ range).
On March 1, we got 10 inches of snow and the next day, in defiance, I started my seeds.
When I first began a garden, I tried starting seeds inside but had no luck until I started using a grow light; there just wasn’t enough natural light to get things going, especially with weak late-winter sun. The only space available in my second-floor apartment is a work table by my kitchen window and, while I would rather not give up a useful cooking space, there really is no option. I’ve ended up getting a two-tier grow light that stacks up on the kitchen, effectively doubling the space in the same footprint, but taking that space out of kitchen commission for four months or so.
I use soil blocks to start my seeds. Because no pots are used, roots don’t wind around a container creating a root-bound seedling. When that happens, the roots need to be loosened up before planting and it takes the plants some recovery time before they get going again. Another one of those transformational books I read was The New Organic Grower (first written in 1989 and revised in 1995) by Eliot Coleman, an influential figure in organic farming. He operates a four-season farm in Maine (!) and has written a several books. His advocacy of using soil blocks rather than pots made a lot of sense to me, that when the roots hit the end of the soil block, they stop growing but the plant continues to grow. You can “pot up” to a larger soil block for larger plants, if necessary, and the roots will grow and spread out again until they reach the end of that block.
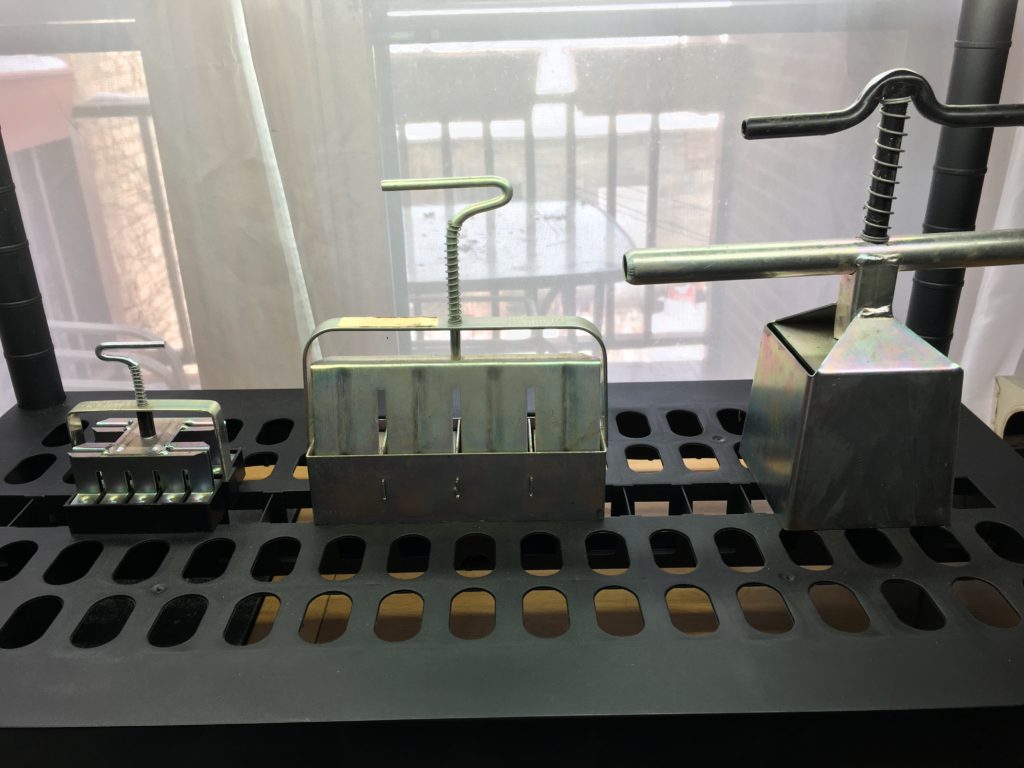
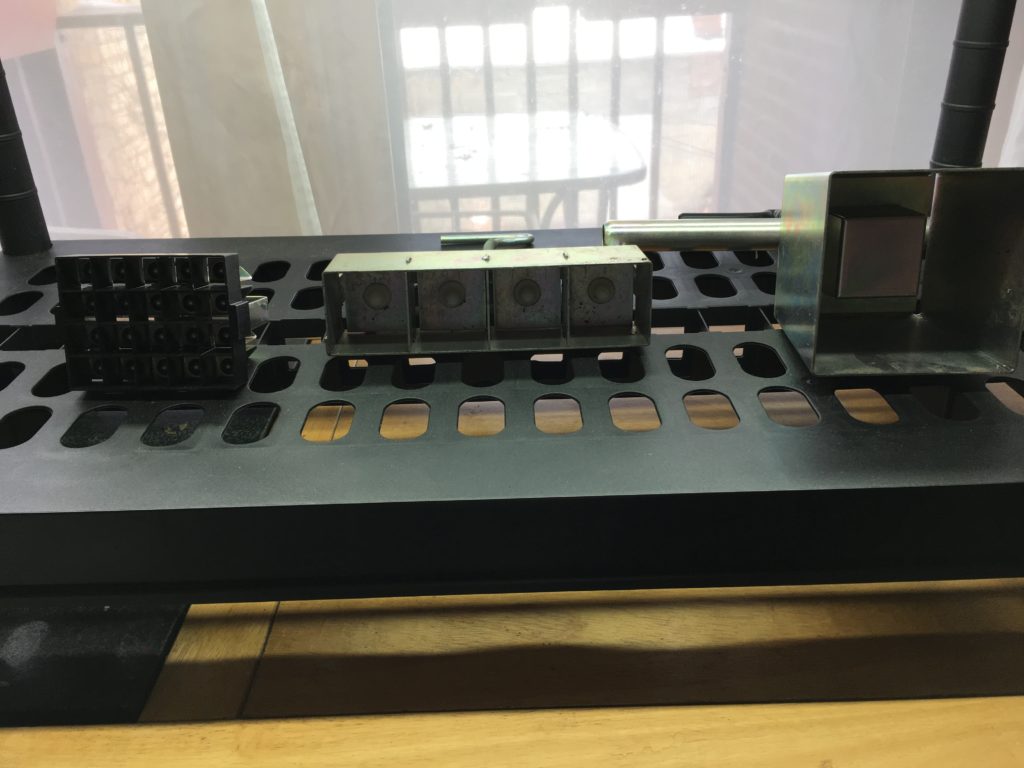
To create soil blocks, I got several different sized blockers, a one-inch, two-inch, and four-inch. I have never used the one-inch size and have only occasionally needed to go up to the four-inch.
Potting soil is mixed up with water into a consistency of wet cement, the blockers get packed with the wet soil, release the lever and voila! A tidy row of soil blocks with a divet in which to place the seeds. It’s a bit of a messy process that I do out on my back porch, and one of those times when I wish I had a utility sink. (My poor kitchen gets a lot of different uses and I feel like I’m always cleaning it).
I put the blocks in long flats with clear covers that act like a greenhouse and park them under the grow lights.
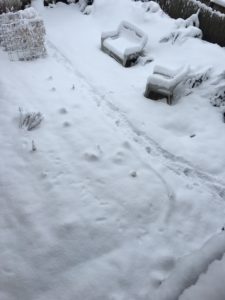
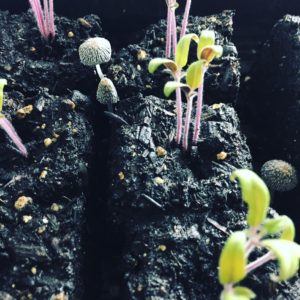
On March 15, my outdoor garden looked like this:
I’ve been doing this for several years now and have had reasonable success, but this year was nearly disastrous. I usually pick up some organic potting soil from my local Co-Op but I had some other soil leftover from re-potting some plants in the fall that I had picked up at a box store in a pinch. Well. My seedlings sprouted just fine and then really struggled, hardly growing at all. Then strange fungus sprouted from the soil blocks. And the seedlings didn’t grow. Some yellowed and died, others just didn’t develop any more than they had in the first few weeks.
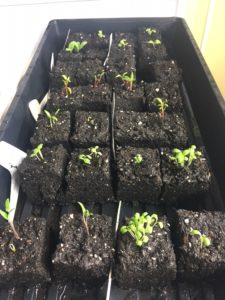
And my inside garden looked like this:
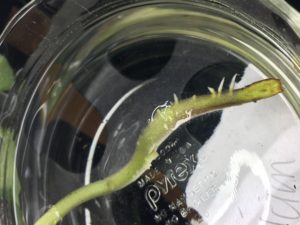
I ended up getting my usual soil, remaking 120 soil blocks, rinsing all the old soil off the roots of each seedling, and then gently poking the roots and seedlings into the new soil blocks. Blammo! They all took off in a matter of days. Lesson learned. I found that most of my tomato stems were weak and bendy where they had been in the old soil and several of them broke off at the soil line. I put them all in some water and was relieved to find that they regenerated roots all along the stem. Phew! (Nasturtiums will do the same thing; I learned that last summer when I decapitated one with the garden hose.)
After 24 hours
After 7 days
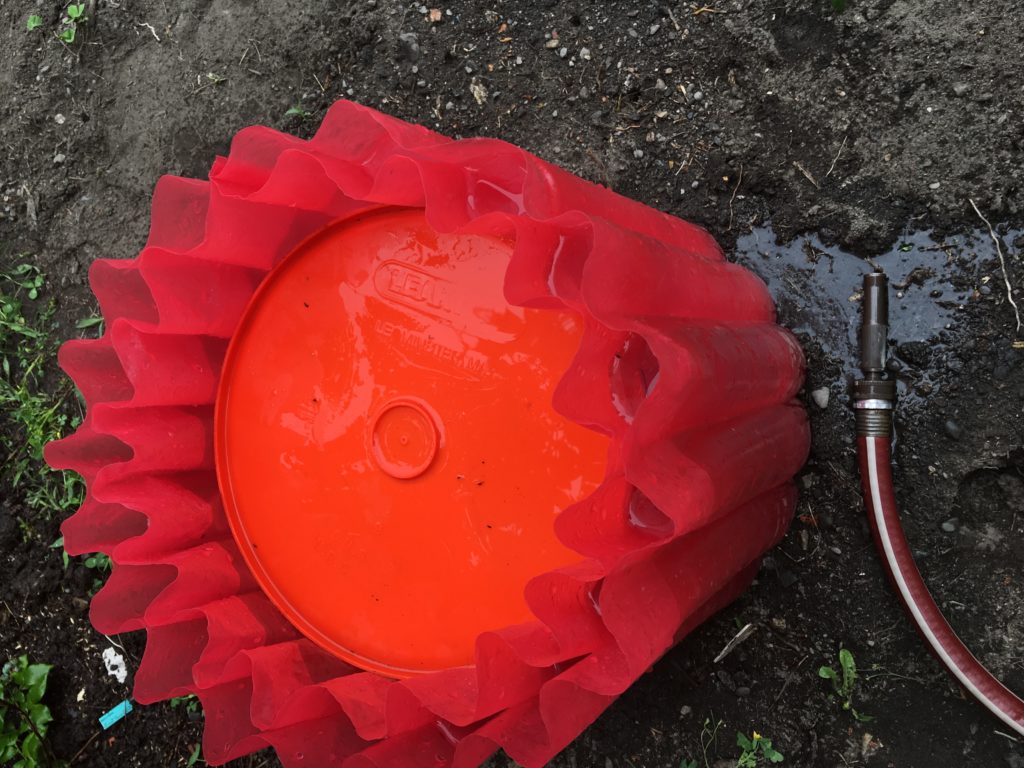
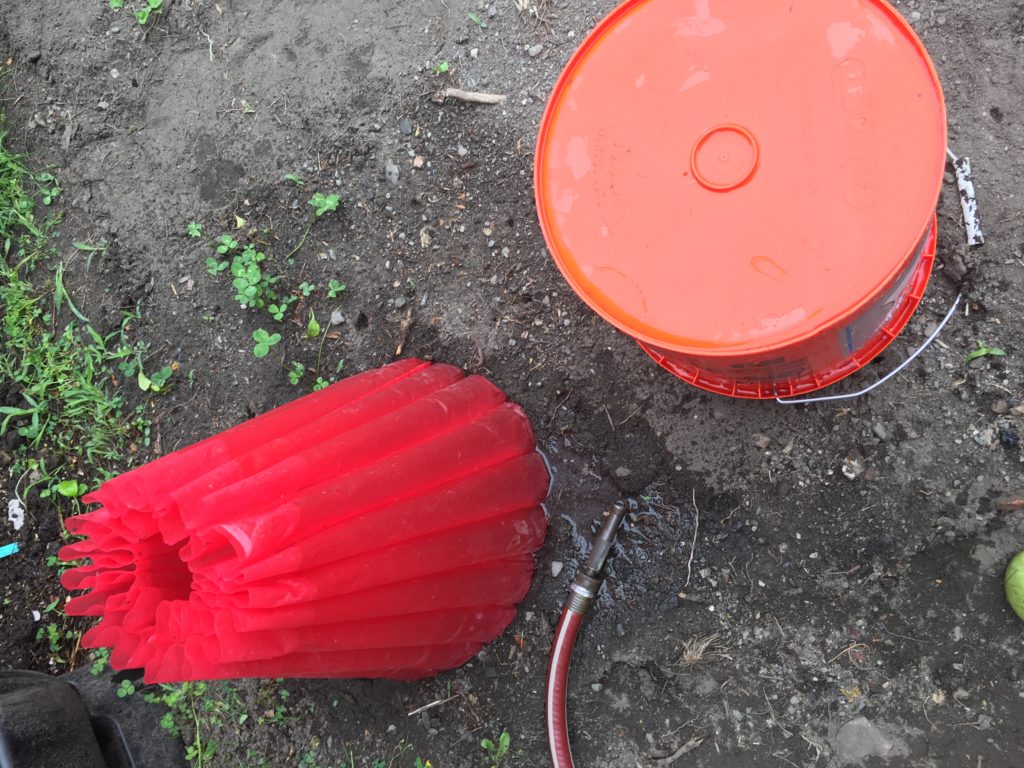
I hardened off (introducing the seedlings to the outdoor temperatures, direct sunlight, and breezes a little at a time) many of the seedlings over the last few weeks out on my back porch and have gotten most of them in the ground now: red-leaf, butter-head, and romaine lettuces, lacinato kale, Swiss chard, dill, cilantro, arugula, nasturtiums, and plum tomato plants are all in. It got very chilly last week so I used my walls o’ water around my tomatoes or, as I prefer to call them, my Devo hats.
Are we not men?
We are tomatoes.
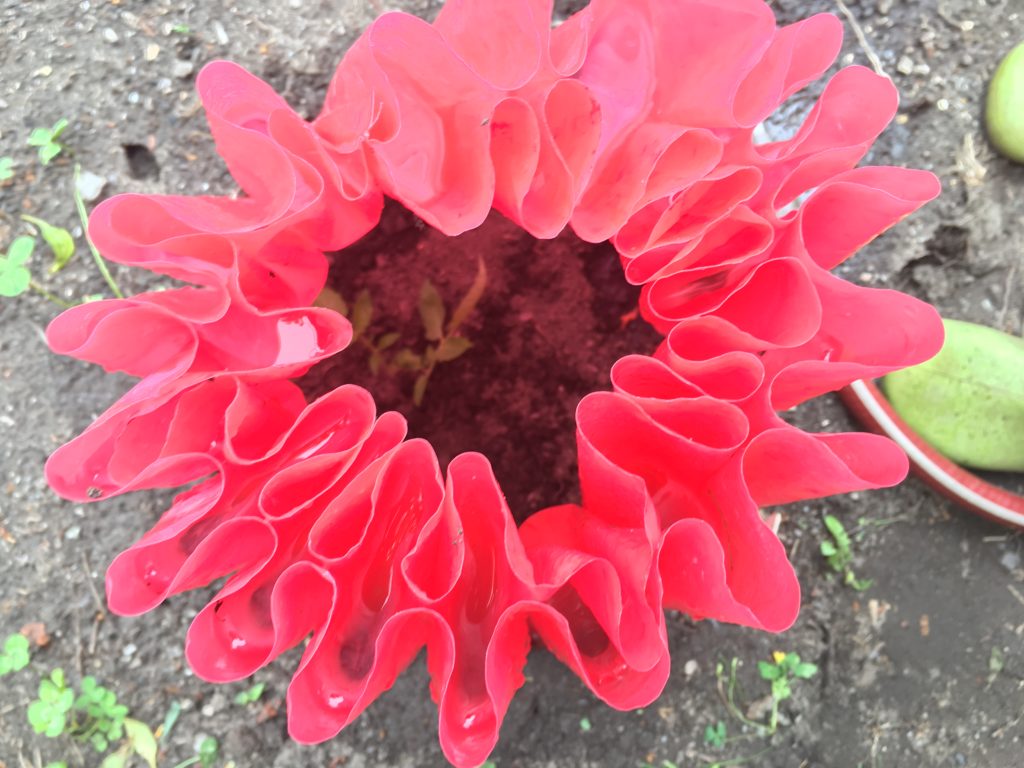
These devices have chambers that are filled with water, which absorb the heat of the sun during the day and keeps the warm-weather loving tomatoes nice and toasty overnight. As the seedlings grow the tops can be propped open for the plant to grow through the opening. I love these things. And they look cool.
Other seeds that are directly sown into the ground are in: several types of radishes, peas, turnips (for my downstairs neighbor), beets, and beans. I also have some sweet pea, morning glory, and moon flower seeds planted, hoping that they will climb up a trellis I tacked up to hide an ugly garage wall.
Still to be transplanted are basil, parsley, pickling and slicing cucumbers, Hungarian wax peppers, eggplant, zucchini, and the rest of the tomatoes (Cherokee purple and Jersey Boy) growing their water roots. Those should go in this week.
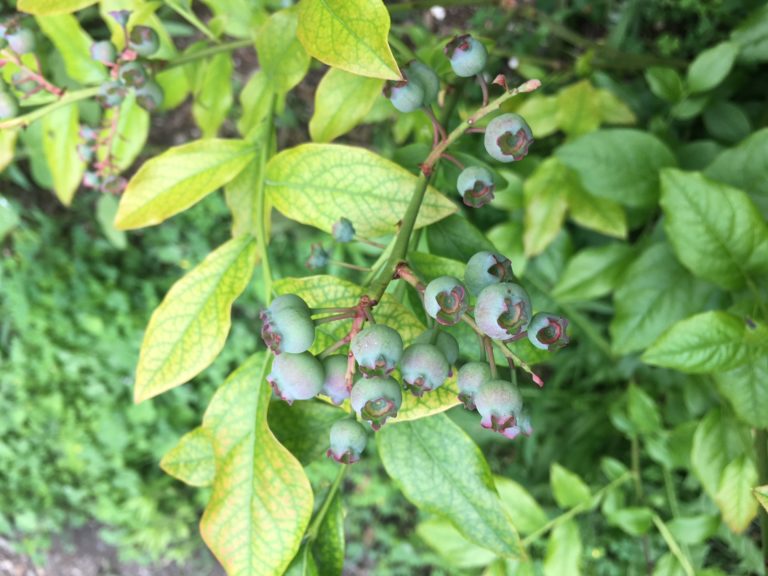
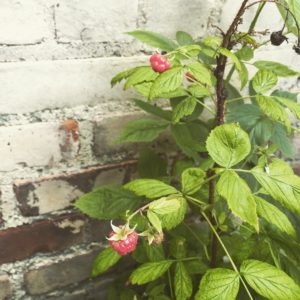
And for the first year ever: berries!
I always forget how much work it takes to get the garden going in the spring, but I forget it all when I bite into my first tomato sandwich of the summer. Can’t wait!
Oh, they well know the roller coaster each year’s garden brings.
Richard Joshua Vincent
11 Jun 2018
Very whimsical description of the evident change in the Mohawk Valley’s climate. thanks for the heads up on pulling out old starter soil from the basement, it explains a lot.
Have at it, and if in a pinch you must go to a box store, Dr. Earth is a bit pricey, but a great product. Jealous of the berries!


Beate
22 Jul 2018Amazing garden, Maria! Cooking from scratch takes on a whole new meaning for a tomato sandwich from your garden 🙂
Handmade Bits and Bobs
28 Jul 2018The first tomato sandwich of the summer from the garden is always cause for celebration!
Russell D McDowell
13 Jun 2018Also, I looked at YouTube to see their video, but no, you made the video, yes? That was some work, Maria. Thanks for the treat.
Handmade Bits and Bobs
13 Jun 2018I did not make the video but grabbed it off YouTube. It’s there somewhere!
Russell D McDowell
13 Jun 2018If you’re not careful there will be an army of organic gardeners waiting on your every word. Thoughtful detail and clear enthusiasm.
Handmade Bits and Bobs
13 Jun 2018Oh, they well know the roller coaster each year’s garden brings.
Richard Joshua Vincent
11 Jun 2018Very whimsical description of the evident change in the Mohawk Valley’s climate. thanks for the heads up on pulling out old starter soil from the basement, it explains a lot.
Have at it, and if in a pinch you must go to a box store, Dr. Earth is a bit pricey, but a great product. Jealous of the berries!
Handmade Bits and Bobs
11 Jun 2018My usual soil stores just fine. This had some kind of added plant food or some such, which is what I think was the culprit.
Carolyn Hauben
10 Jun 2018Absolutely fabulous!,
Handmade Bits and Bobs
11 Jun 2018It’s been a busy spring!